> For the complete documentation index, see [llms.txt](https://8bit-1.gitbook.io/solibrary/llms.txt). Markdown versions of documentation pages are available by appending `.md` to page URLs; this page is available as [Markdown](https://8bit-1.gitbook.io/solibrary/deploying-a-solana-memecoin-using-cli.md).
# Deploying a Solana Memecoin using CLI
In this guide, we’ll walk you through the process of creating your own token on Solana, step by step, leveraging the power of the Solana Command Line Interface (CLI) tools and Metaplex.
## . Install Solana CLI Tools
First, download the Solana Command Line Interface (CLI) tools with the necessary commands to interact with the Solana blockchain.
Click here:
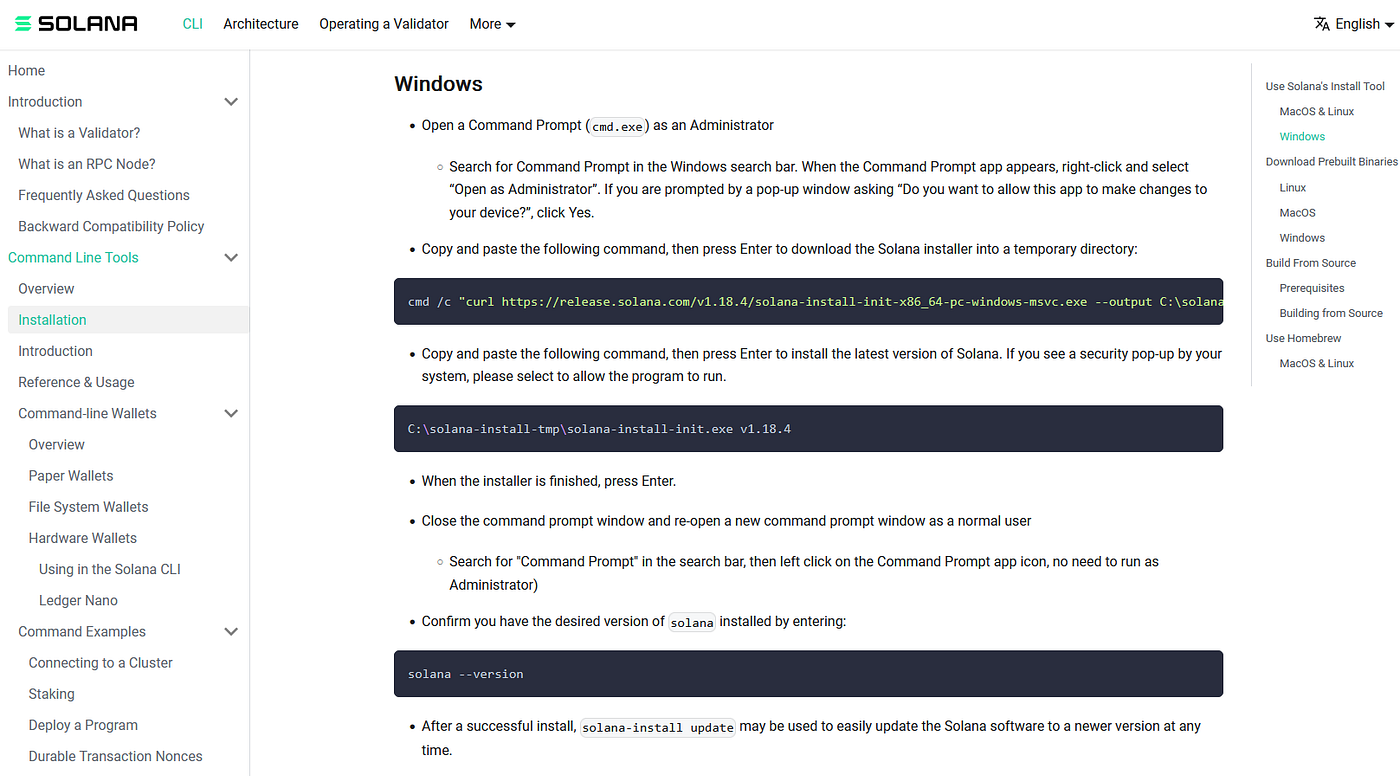
For windows you’ll have to run these commands:
```
cmd /c "curl https://release.solana.com/v1.18.4/solana-install-init-x86_64-pc-windows-msvc.exe --output C:\solana-install-tmp\solana-install-init.exe --create-dirs"
```
and
```
C:\solana-install-tmp\solana-install-init.exe v1.18.4
```
## 2. Generate a Wallet
Then, use `solana-keygen new` to create a new Solana wallet. Remember to fund this wallet with SOL tokens to cover transaction fees.
## 3. Create Your Token
Execute the token creation command with a specified program ID, typically the Token Program’s ID for standard tokens. Save the output token address.
```
spl-token create-token --program-id TokenzQdBNbLqP5VEhdkAS6EPFLC1PHnBqCXEpPxuEb
```
## 4. Set Up Your Project
Download this tool: and install dependencies with `npm install`. Prepare your project for token manipulation.
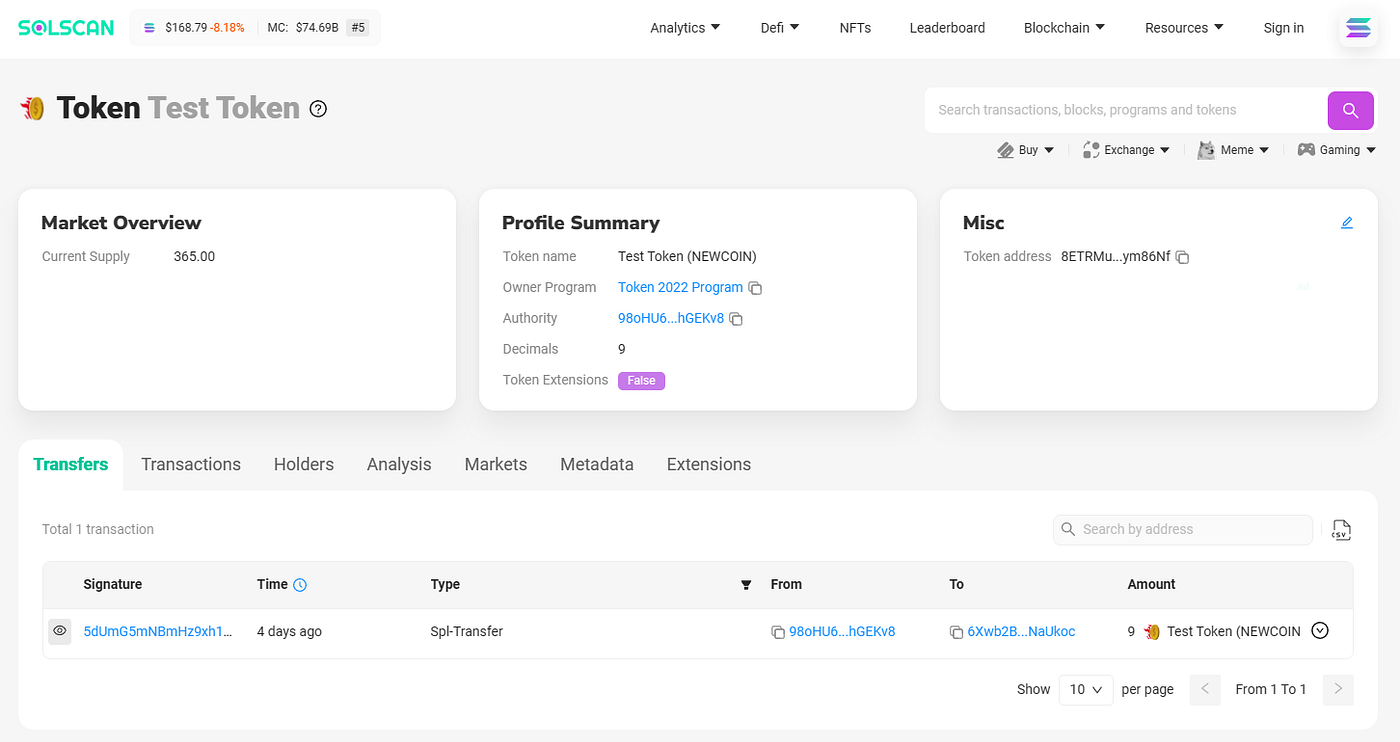
## 5. Configure Your Token
Create a `.env` file in your project with key details like your token address, coin name, symbol, and metadata URI.
```
KEYPAIR_FILE ="C:\Users\Equipo\.config\solana\id.json"
UMI_RPC_ENDPOINT ="https://api.mainnet-beta.solana.com"
TOKEN_ADDRESS ="8ETRMuisyt8fgtdVFKx2JWSSqtuQxQyCuWEBQJym86Nf"
METADATA_NAME="Test Token"
METADATA_SYMBOL="NEWCOIN"
METADATA_URI="https://coinrace.online/token/metadata.json"
```
## 6. Run the Setup Script
Execute thescript, with `ts-node token22`, to execute and finalize your token's setup, including minting and distribution configurations.
## 7. Mint Your Tokens
Create a token account with `create-account`, then mint tokens to this account using the `mint` command and the desired initial supply amount.
```
spl-token create-account
spl-token mint
```