> For the complete documentation index, see [llms.txt](https://8bit-1.gitbook.io/solibrary/llms.txt). Markdown versions of documentation pages are available by appending `.md` to page URLs; this page is available as [Markdown](https://8bit-1.gitbook.io/solibrary/candy-machine.md).
# Candy Machine
## Let's get started.
The first step is to clone Metaplex.
```
git clone
```
Then cd into the src section.
cd metaplex/js/packages/cli/src/
And use the yarn install command. After we've installed it, we'll create a directory called assets first. Then put the images that you want to mint in there, naming them 0, 1, 2 in the order you want. For example, James will make 4 examples, so James will put 4 images in the assets directory, naming them 0.jpg, 1.jpg, 2.jpg, 3.jpg. And you have to create a .json file for each image.
```
{
"name": "",
"symbol": "",
"image": "",
"properties": {
"files": [
{
"uri": "",
"type": ""
}
],
"creators": [
{
"address": "",
"share": 100
}
]
}
}
```
Now that everything is ready, here James will be working on devnet. Readers can use the **solana config get** command to double check that it is really on devnet by looking at **the RPC URL:** [https://api.devnet.solana.com](https://api.devnet.solana.com/)
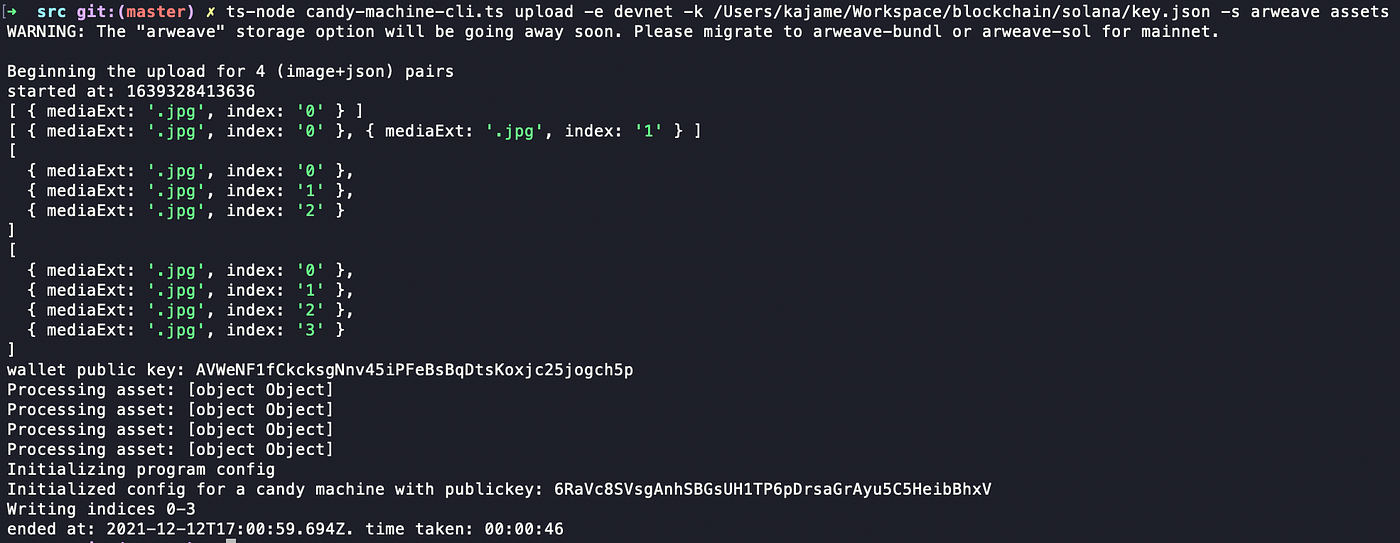
Then we will use the command to upload the image that we prepared with candy machine cli to upload.
```
ts-node candy-machine-cli.ts upload -e devnet -k -s arweave Which James's will be like this.ts-node candy-machine-cli.ts upload -e devnet -k /Users/kajame/Workspace/blockchain/solana/key.json -s arweave assets
```
But now it seems like there is an error as shown in the image below.
Error when running command
Someone has also opened an issue:
We'll make a temporary change first, which is to go to the src/upload.ts file and go to line 366. We'll make the following changes:
```
const manifest = getAssetManifest(
dirname,
`${assetKey.index}.json`,
);We will remove the .json, which will look like this.const manifest = getAssetManifest(
dirname,
`${assetKey.index}`,
);
```
Now try running this command again in the terminal.
```
ts-node candy-machine-cli.ts upload -e devnet -k /Users/kajame/Workspace/blockchain/solana/key.json -s arweave assets
```
You will find that there are no more problems.
There is no problem anymore.
If we observe, we will find that there is a directory named .cache and a file called devnet-temp.json and the uploaded image data.
> ***Additional update:** The above problem should no longer exist because it seems like they have merged and fixed the problem. Therefore, we may not need to edit the* src/upload.ts file anymore.
### Create Candy Machine
What we will do next is to create a Candy Machine, but James will use the Token that James created before as the coin for inserting (i.e. using the MID coin that we wrote about in previous articles to insert, by inserting 303 MID per 1 image) with the command:
```
ts-node candy-machine-cli.ts create_candy_machine -e devnet -k -t -a -p Which James will set it like this.ts-node candy-machine-cli.ts create_candy_machine -e devnet -k /Users/kajame/Workspace/blockchain/solana/key.json -t 3bm2qFdAJ4GXWFqrcoRX5xZ2mX4kgZRPgm5MMXMjXhPm -a 27gY9ewKm1NT856vGsaQGc191NZB7Nta6ntQfFhnRHX8 -p 303
```
If there are no errors, a message similar to the one below will be displayed.
Display information when using the Candy machine creation command
Now James will get the candy machine pubkey as this value: 8cKsNhfcMWN2HxyPWPEh2PCdppsEDxq7T4iCzvdXg7GN
### The next step is to update the date of the candy machine.
By using the command
```
ts-node candy-machine-cli.ts update_candy_machine -e devnet -k /Users/kajame/Workspace/blockchain/solana/key.json --date "now"
```
When the update is complete, the message as shown in the picture will be displayed.
Update date of candy machine
From the image, the startDate timestamp value is: 1639328726.79
### Create a Mint NFT Website
In this section, if we do not specify spl-token to use mint (did not specify -t when creating candy machine), we can clone the project from [candy-machine-mint.](https://github.com/exiled-apes/candy-machine-mint.git) But if we specify the spl-token to be minted, [it is better to clone the project from this.](https://github.com/jame3032002/candy-machine-mint) I found a way to adjust it to use spl-token. The original link is in the Reference at the end.
```
git clone
```
After the project has been cloned, please add the .env file to the root project. Copy the values from .env.example first.
```
REACT_APP_CANDY_MACHINE_CONFIG=__PLACEHOLDER__
REACT_APP_CANDY_MACHINE_ID=__PLACEHOLDER__
REACT_APP_TREASURY_ADDRESS=__PLACEHOLDER__
REACT_APP_CANDY_START_DATE=__PLACEHOLDER__REACT_APP_SOLANA_NETWORK=devnet
REACT_APP_SOLANA_RPC_HOST=
```
REACT\_APP\_CANDY\_MACHINE\_CONFIG Enter the candy machine config value, which can be found in the .cache/devnet-temp.json file. Enter the value in the config section.
REACT\_APP\_CANDY\_MACHINE\_ID Enter the value obtained when creating the candy machine, which is the candy machine pubkey.
REACT\_APP\_TREASURY\_ADDRESS **If we set spl-token when creating the candy machine, in this section we must enter the account address value that was created when creating the spl-token.** However, if we did not set spl-token when creating the candy machine, we must enter the Wallet address that will go to this wallet when someone presses mint.
REACT\_APP\_CANDY\_START\_DATE Enter the start date timestamp value that we got when we used the command to update the date of the candy machine.
James will put the .env value as follows:
```
REACT_APP_CANDY_MACHINE_CONFIG=6RaVc8SVsgAnhSBGsUH1TP6pDrsaGrAyu5C5HeibBhxV
REACT_APP_CANDY_MACHINE_ID=8cKsNhfcMWN2HxyPWPEh2PCdppsEDxq7T4iCzvdXg7GN
REACT_APP_TREASURY_ADDRESS=27gY9ewKm1NT856vGsaQGc191NZB7Nta6ntQfFhnRHX8
REACT_APP_CANDY_START_DATE=1639328726.79REACT_APP_SOLANA_NETWORK=devnet
REACT_APP_SOLANA_RPC_HOST=
```
Then use the command
```
yarn install
```
And start with the command
```
yarn start
```
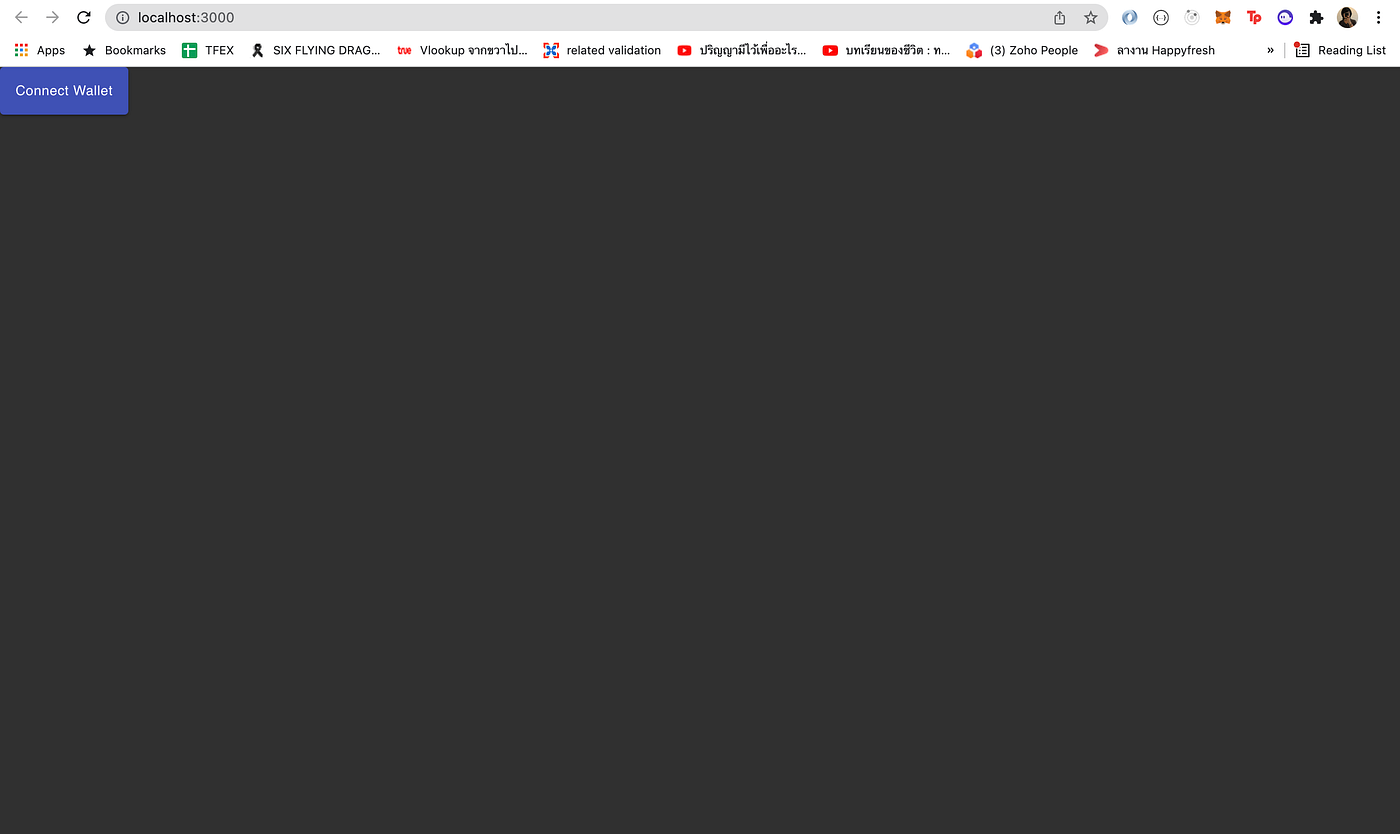
After starting, go to and you will see a web page as shown in the picture.
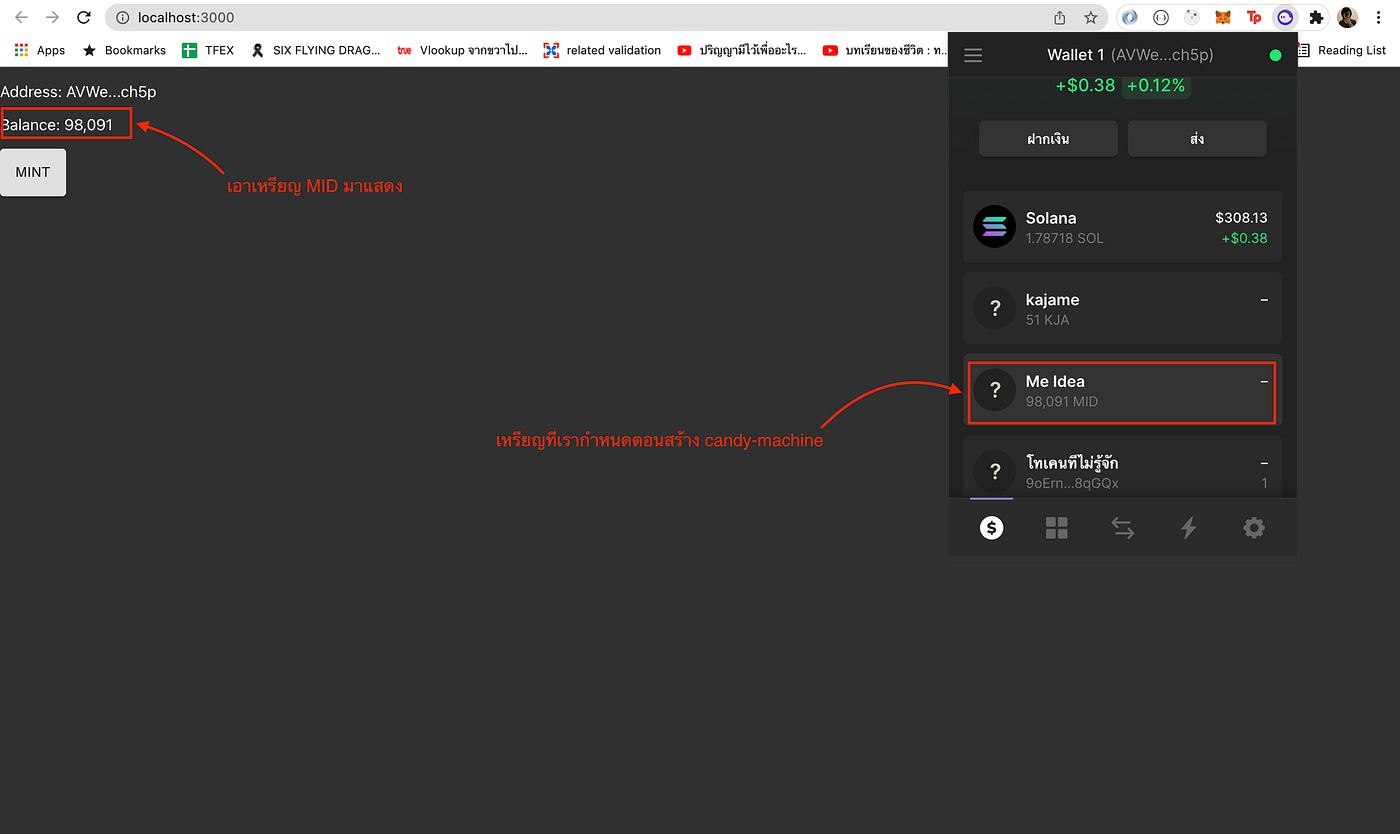
Then connect our Wallet properly. When connected, you will see that in the Balance section, it will show the spl-token coin that we specified when creating the Candy machine that we will use this coin for minting.
Show MID Coin Balance
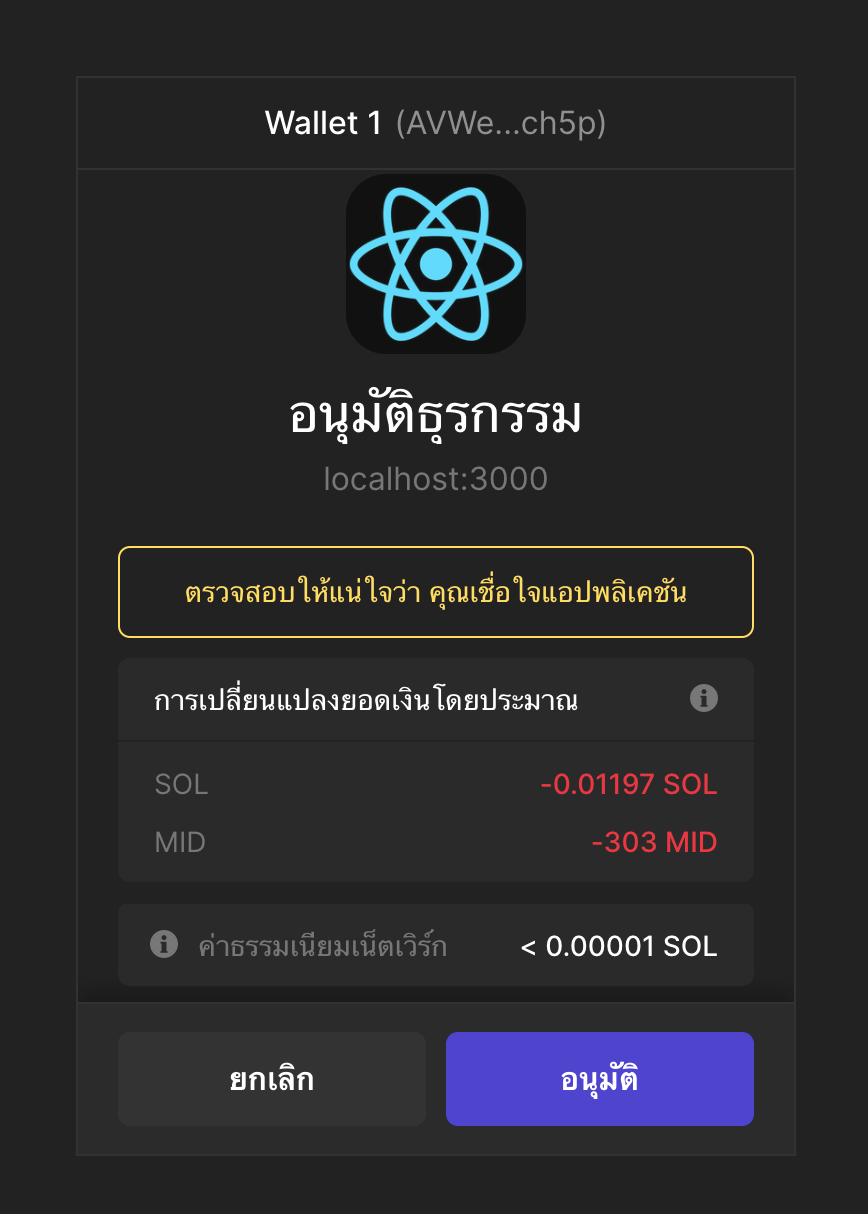
When we try to press Mint, we will see that it will show transaction approval details, which will be shown as the number 303 MID (which we specified when creating the Candy machine) as shown in the picture.
Show transaction approval details, you will see 303MID lost.
James is not sure if we can set it to only lose the specified spl-token. If we try it, we will update this article.
When you press approve, you will see that the number of coins available will decrease by the specified amount.
The amount decreased by 303 MID.
This is the NFT that we minted.
But now I'm not sure if the NFT that was minted doesn't show the image. I'm not sure if it's because something has changed. Because when I tried it, it seemed to show the image, but when I did it recently, it didn't show. But I think if I try it on the mainnet, I think there shouldn't be a problem.
The number of tokens in the wallet that created this token (before trying to mint)
After the mint is complete, the number of coins will increase by the specified amount.